-
By Samuel Calderon
- In Analysis Business Data Science ERP
Epicor Functions make logic management easier by allowing users to create and reuse logic in a centralized way. Here’s a basic guide to getting started with Epicor Functions.
Step 1: Understand the Basics
Epicor Functions work like standalone logic modules that can be called internally or externally. You’ll be working within a familiar BPM (Business Process Management) environment but with more flexibility. Think of Epicor Functions as a way to create custom processes that can be reused across your system.
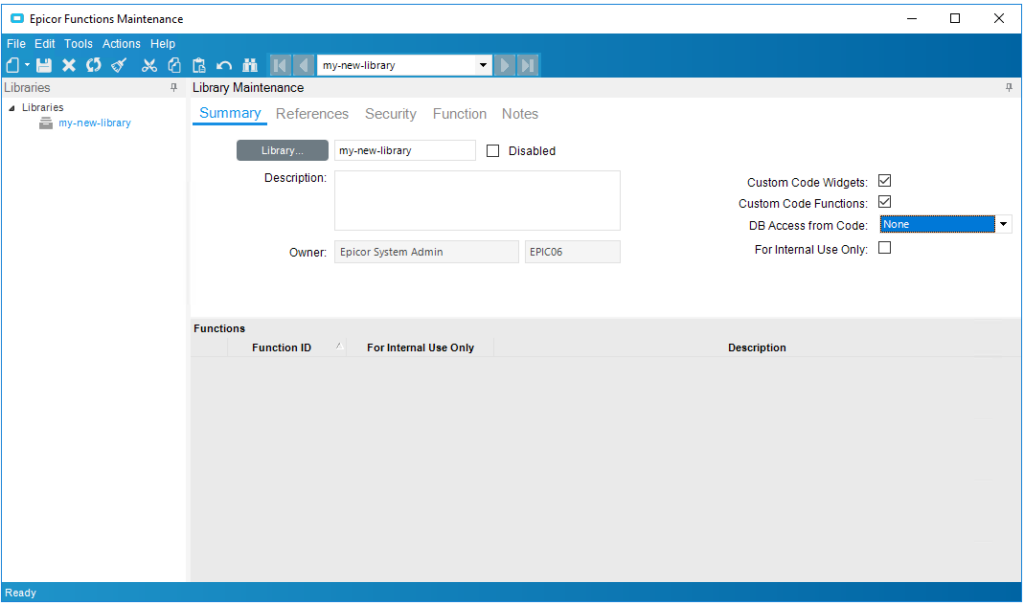
Step 2: Create a Function Library
Before creating a function, you need to organize your logic into Function Libraries. This ensures your functions are grouped logically and helps avoid conflicts when multiple teams are working in the same environment.
- Navigate to the Functions menu in Epicor (System Management > Business Process Management > Epicor Functions Maintenance).
- Create a new Function Library by giving it a unique name.
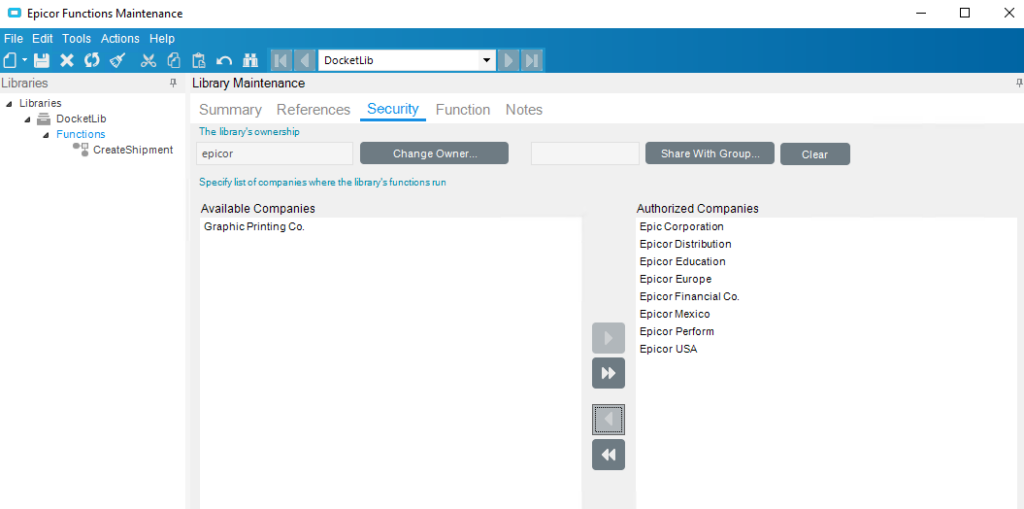
- Assign companies you have to select which companies are going to be able to use this library on Security tab.
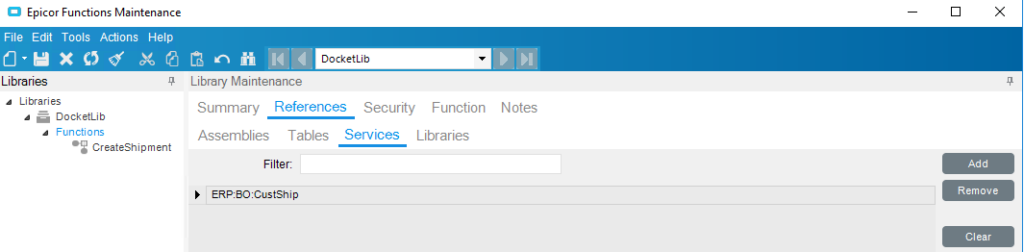
- Add required References Inside References Tab, go into Services and Libraries and add all the services that you want to use on this library.
Step 3: Develop Your First Function
Once your library is set up, you can create your first function.
- Create a new function in your library.
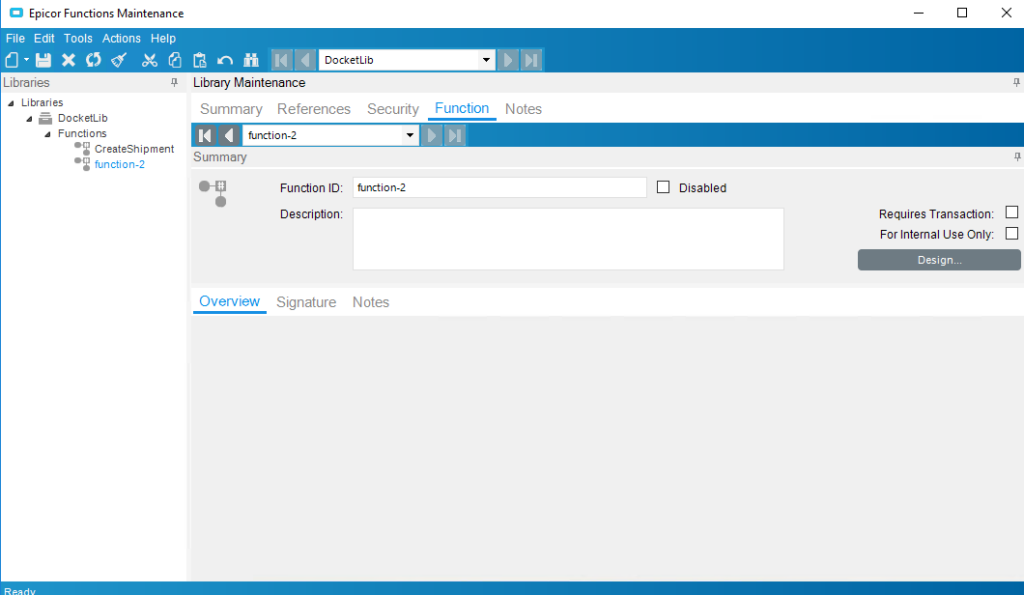
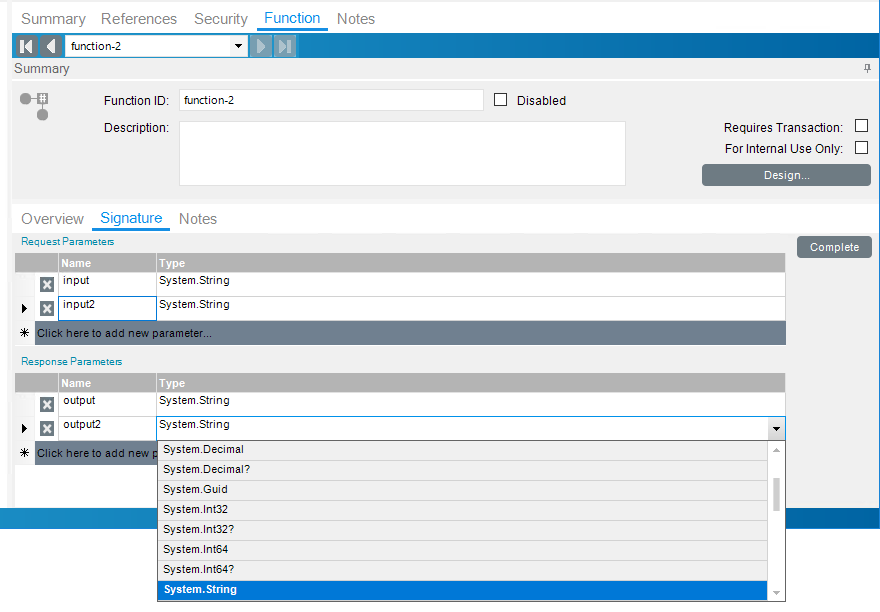
- Define the inputs and outputs for your function. These act as the parameters and results of your logic, you can locate them at the signature tab of your function.
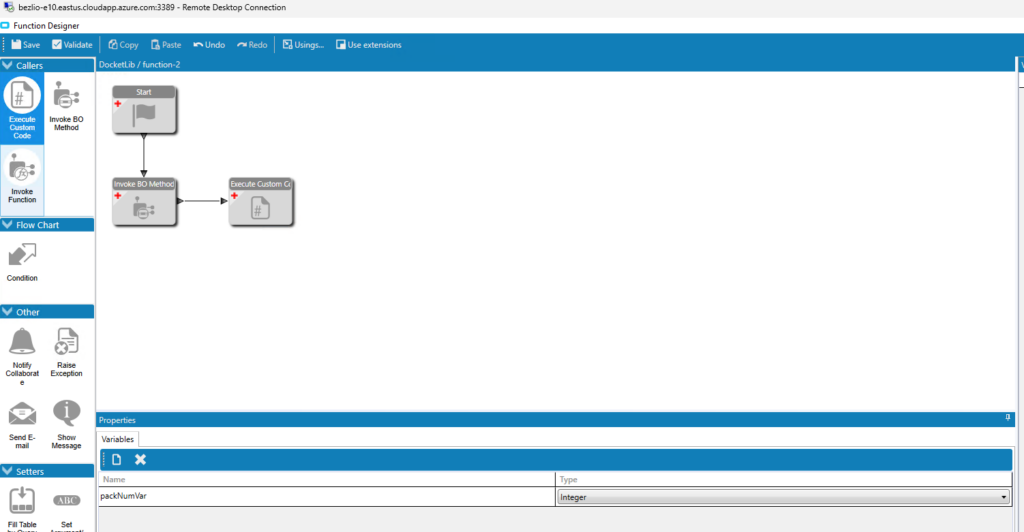
- Build your logic using the BPM editor. You can use widgets to define actions or write custom C# code if needed.
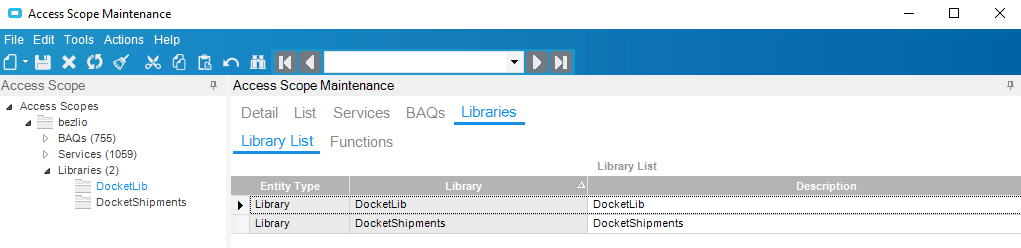
Step 4: Add Function Library to API Key Scope
Before testing your function, ensure that your API key has access to the newly created function library.
- Navigate to Access Scope Form in Epicor.
- Add the function library to the scope of your API key to grant necessary permissions.
- Save the changes to update the API key’s access.
Step 5: Test Your Function Without Promoting to Production
You don’t need to promote your Epicor Function to production to test it. You can test it in a staging environment by using the appropriate URL.
- Promoted URL:
https://your-epicor-server/api/v2/efx/your-function - Staging URL:
https://your-epicor-server/api/v2/efx/staging/your-function
Use the staging URL during development and testing to ensure everything works as expected before promoting the function to production.
Step 6: Deploy Your Function
To finally use you function via REST you have to promote the library to production.
- Take your time with this when you promote to production, you deploy all of the functions inside the library this means that if you have unfinished work on a function, that function its going to be exposed on the REST.
- Deploy your function by clicking the “Promote Library to Production” item from the actions tab on Epicor Function Maintenance Form.

Step 7: Integrate with Other Applications
Epicor Functions shine in integration scenarios. After creating your function, you can call it from within the ERP system or externally via REST.
- Use REST API calls to trigger your function from external systems.
- Test and validate your function to ensure it works correctly across different use cases.
Final Thoughts
Epicor Functions offer a robust way to manage logic in your ERP system. Whether you’re creating simple workflows or complex processes, following these steps will help you set up and deploy Epicor Functions with ease. Start by exploring the features in your Epicor environment and see how they can transform your operations.