-
By Samuel Calderon
- In Data Science ERP
In this first part of our series on using Business Activity Queries (BAQ) in Epicor, we will guide you through the foundational steps of setting up and using BAQ effectively. Whether you’re new to Epicor or looking to refine your skills, this guide will help you understand the basics, from setting up your general sheet to adding tables and configuring your query.
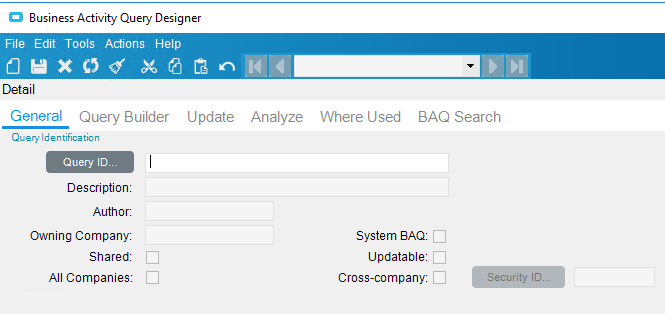
1. Introduction to the General Sheet of a BAQ
The General sheet is the starting point for creating any BAQ. This is where you define the basic properties of your query, such as the name, description, and type of BAQ you are creating. It’s essential to give your BAQ a clear and descriptive name, as this will help you and others identify the query later.
Key Elements:
- Query ID: A unique identifier for your BAQ.
- Description: A brief explanation of what the BAQ does.
- Type: Specifies whether the BAQ is for internal use, shared across the organization, or updatable.
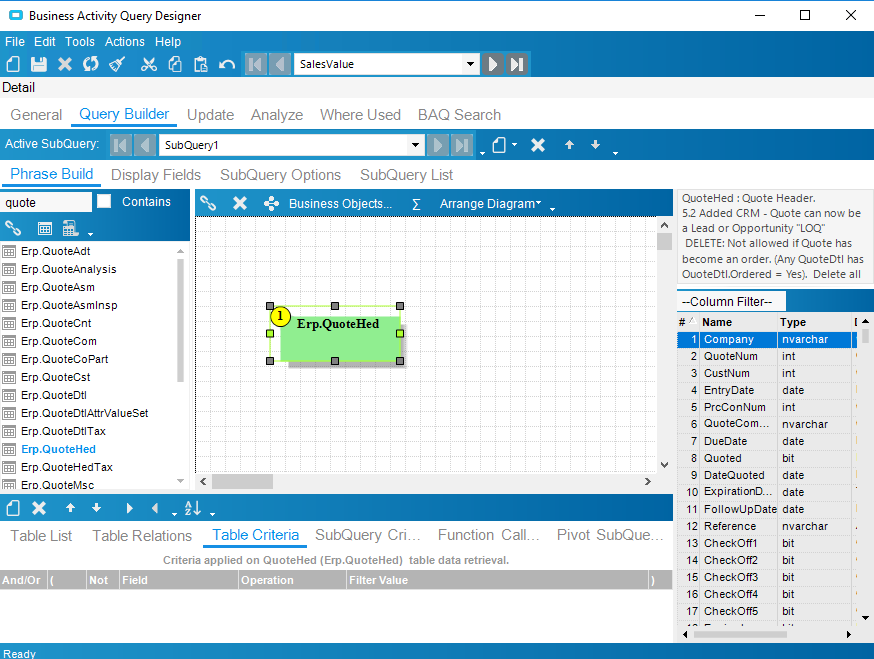
2. Adding Tables
After setting up the general information, the next step is to add the tables that will serve as the data sources for your query. Epicor allows you to include multiple tables, which you can then link together to create a cohesive data set.
Steps to Add Tables:
- Navigate to the Tables list on your BAQ setup screen.
- Use the Add Table button to select the tables you need from the available options.
- Ensure that you select the correct tables that contain the data you wish to query.
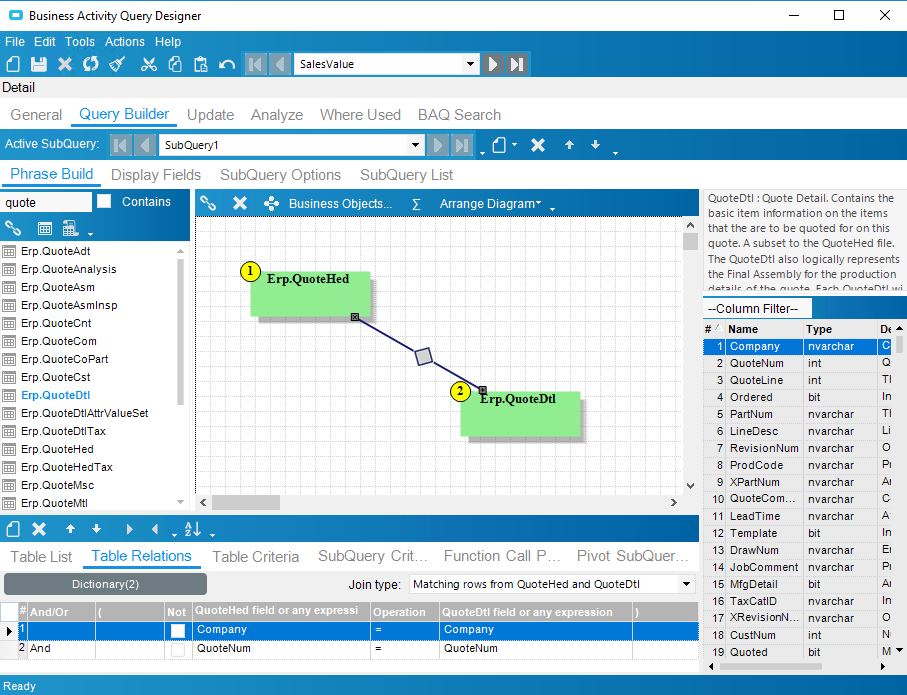
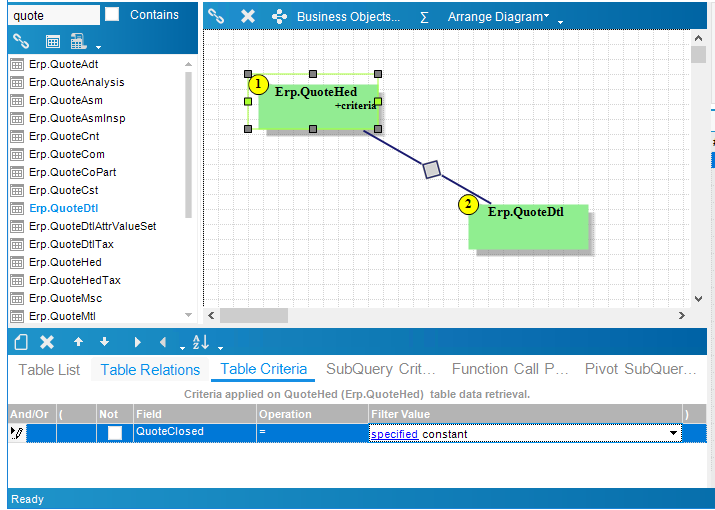
3. Configuring Table Relations
Once you’ve added the necessary tables, it’s crucial to establish relationships between them. This step ensures that the data retrieved from different tables is related and can be displayed in a meaningful way.
Steps to Configure Relations:
- Access the Table Relations section.
- Define relationships between tables by selecting common fields that will link the data.
- Consider the type of join (inner, outer, etc.) based on how you want the data to correlate.
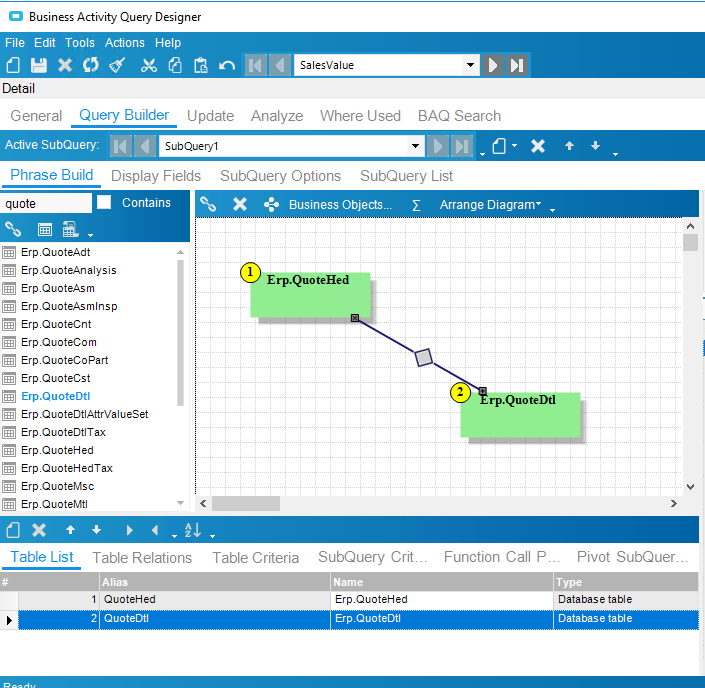
4. Managing the Tables List
The Tables List provides an overview of all the tables included in your BAQ. This list allows you to manage the tables, ensuring that all necessary data sources are included and correctly configured, you can see it on the bottom section of the form, being the first option.
Managing the List:
- Review the list to ensure all required tables are present.
- Adjust table order or remove any unnecessary tables.
- Confirm that all tables are correctly linked.
5. Setting Table Criteria
Table Criteria allow you to filter the data retrieved by your query. This is where you specify conditions that the data must meet to be included in the query results.
How to Set Criteria:
- Navigate to the Table Criteria section.
- Add conditions based on the fields available in your selected tables.
- Use logical operators (AND, OR) to refine your criteria.
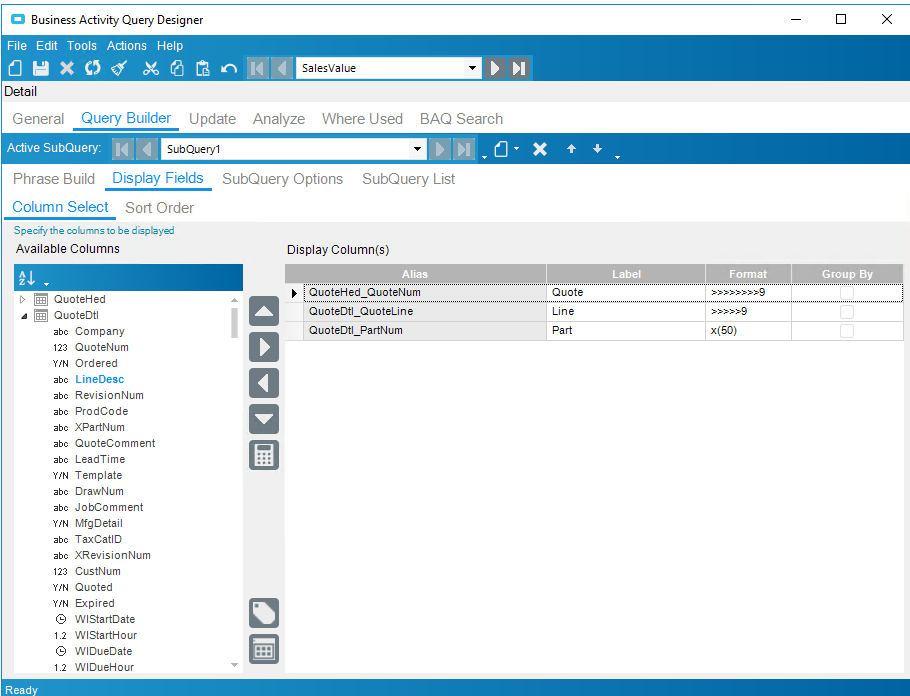
6. Display Fields
Finally, it’s essential to select which fields from your tables will be displayed in the query results. This step allows you to tailor the output of your BAQ to include only the most relevant data.
Selecting Display Fields:
- Go to the Display Fields section.
- Choose the fields that are critical for your analysis.
- Arrange these fields in the desired order of appearance in your output.
7. Analyze and Test Your BAQ
Once you have set up your BAQ with all the necessary tables, relations, and display fields, it’s crucial to analyze and test the query to ensure it functions correctly. The Analyze section in Epicor’s BAQ Designer allows you to do this efficiently.
Steps to Analyze a Query:
- Access the Analyze Sheet: Navigate to the Analyze sheet within the BAQ Designer interface.
- Run the Analysis: Click the Analyze button. This action will trigger the system to verify your query’s syntax and provide feedback in the Query Execution Messages pane. Any detected errors, such as SQL syntax issues, will be displayed here. If there are no errors, the system will indicate that your query is ready for testing.
- Test the Query: After analyzing, you can test the query by specifying the number of rows to return from the dropdown list (e.g., 10, 50, or 100). This helps you to see if the data you expect to retrieve appears as intended.
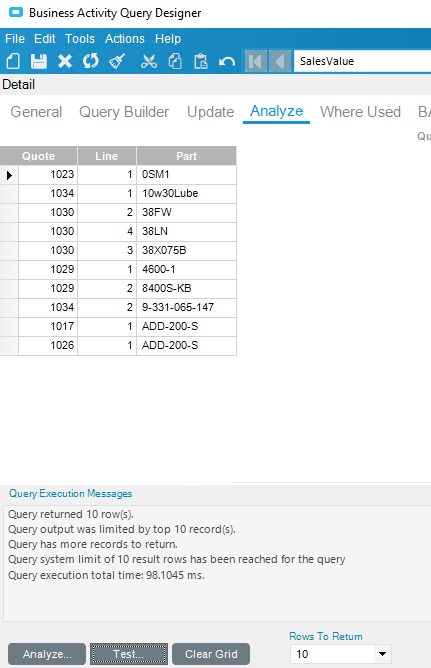
Why Analysis is Important: The analysis step is essential because it helps you catch and resolve issues before the query is deployed in a live environment. This ensures that the data pulled by the BAQ is accurate and that the query runs efficiently without errors.
Advanced Testing:
- If you are working with updatable BAQs, the Analyze sheet also allows you to verify that the BAQ can successfully pull in data, update records, and add new records. This is critical for ensuring that users can interact with the data as expected in dashboards or other user interfaces.
Error Handling:
- If the BAQ runs into issues during execution, such as running for too long, you can cancel the execution using the provided controls. This feature is particularly useful when working with complex queries that might pull large datasets.
Conclusion
This first part of our BAQ series sets the foundation for more advanced queries. By mastering the general sheet, adding tables, configuring relationships, and selecting display fields, you’ll be well-equipped to create basic yet powerful queries in Epicor. Stay tuned for the next installment, where we’ll dive deeper into customizing and optimizing your BAQs for more complex data analysis. Be sure to stay tune at our news section for next episodes!.